Small Kitchen Counter Organization: 15 Clear-Counter Ideas
Small kitchen counter organization made practical: 15 ways to protect prep space, place appliances, control sink clutter and create useful zones without making the kitchen inconvenient.

Small kitchen counter organization should protect the counter’s main job: giving you enough clear, safe space to prepare food. In a compact apartment kitchen, the counter often becomes storage for appliances, fruit, mail, coffee supplies, dish soap, spices and groceries at the same time. The result is a surface that technically holds a lot but becomes frustrating every time you need to chop vegetables or set down a hot pan.
The answer is not to hide everything. A kitchen that looks empty but makes you open four cabinets to make coffee is not practical. Instead, decide which items deserve permanent counter space, group those items around the tasks they support, and move occasional-use objects to cabinets, walls, carts or other storage zones.
Photo: Christian Mackie / Unsplash.
Why Small Kitchen Counters Fill Up So Fast

Counter clutter is usually the result of convenience, not carelessness. The coffee maker stays out because it is used every morning. Oil stays near the stove because it is used every evening. Mail lands near the door because the counter is the first flat surface. A dish rack remains beside the sink because dishes need somewhere to dry. Each item has a reason, but the combined footprint can consume the whole work surface.
Small kitchens also have fewer secondary surfaces. There may be no island, pantry counter, butler’s pantry or dining-side console to absorb overflow. That means every square inch of counter needs a clearer purpose.
Before buying shelves or trays, decide what the counter needs to do during a normal weekday: prepare breakfast, make coffee, unpack groceries, chop vegetables, plate dinner, dry dishes or pack lunch. Those tasks should determine what stays visible.
Measure Usable Counter Space, Not Just Total Counter Length
A long counter can still have very little usable prep space if the sink, cooktop, outlets, appliance doors and corner geometry break it into small fragments. Measure each uninterrupted section separately.
- Prep sections: measure clear width and depth where a cutting board can sit flat.
- Appliance footprint: measure the actual appliance plus the space required to open lids, doors or water reservoirs.
- Outlet reach: note where cords can safely reach without crossing the sink or cooktop.
- Cabinet clearance: open upper and lower doors to see whether tall items interfere.
- Heat and splash zones: follow appliance and cooktop manufacturer instructions rather than placing storage where heat, steam or water can damage it.
- Landing space: identify where groceries, pans or dishes normally need to land.
Take a photograph of the counter before moving anything. The picture makes it easier to see what is consuming surface area because you are looking at the space as a whole rather than as individual objects.
Use a Three-Level Decision Before Buying Organizers
| Level | What belongs there | Examples |
|---|---|---|
| Counter | Used almost every day and supports a defined task | Coffee maker, kettle, knife block if truly used, dish soap |
| Easy cabinet/drawer | Used regularly but not every day | Blender, toaster, mixing bowls, specialty oils |
| Deep/remote storage | Occasional or seasonal | Holiday serving pieces, specialty appliances, backup supplies |
If an item has no clear reason to live on the counter, test moving it away for one week. If nobody misses it, the counter probably was not its best home.
15 Small Kitchen Counter Organization Ideas
1. Protect One Continuous Prep Zone Before Organizing Anything Else
Choose the largest practical uninterrupted section of counter and declare it the default prep area. Do not fill it with decorative containers. The surface should be easy to wipe, large enough for your cutting board or mixing bowl and close enough to the sink or cooking zone to work efficiently.
If your kitchen has only short counter fragments, choose the one that creates the safest workflow for your normal cooking pattern. You may need to move an appliance that has occupied that spot for years simply because it was placed there when you moved in.
2. Give Every Countertop Appliance a Usage Test
Write down how often you actually use each appliance. A coffee maker used daily has a stronger claim to visible space than a blender used twice a month. A toaster used every morning may stay; a stand mixer used for holiday baking may move.
Also measure the effort required to retrieve the appliance. A heavy machine stored above shoulder height may be impractical even if it is not used daily. In that case, a lower cabinet, rolling cart or sturdy pull-out shelf may be safer than either the counter or an upper shelf.
Do not store appliances in a location that violates their instructions or makes cords, heat or ventilation unsafe.
3. Create a Compact Coffee or Tea Zone
If coffee or tea is a daily routine, group the essential equipment together instead of spreading it across the counter. Keep the machine or kettle, a small amount of frequently used supplies and perhaps a mug rail or nearby cabinet in one zone.
A tray can visually contain sugar, filters or tea bags, but the tray should not become a license to keep every flavor and accessory visible. Backstock belongs in a cabinet. The counter zone should support the current week, not display the entire collection.
4. Keep Cooking Oils and Utensils Near the Stove—but Outside Unsafe Heat Zones
Frequently used cooking tools are convenient near the stove, but convenience does not override appliance safety. Follow the range or cooktop manufacturer’s clearance guidance and keep combustible or heat-sensitive items away from burners and hot surfaces.
Use one narrow utensil crock if it genuinely replaces repeated drawer opening. Limit it to the tools used most often. A crock packed with twenty utensils is harder to clean and often blocks the very counter space it was meant to simplify.
5. Replace Multiple Small Containers With One Intentional Tray
A tray is useful when several related items must remain on the counter. It creates a clear boundary and makes cleaning easier because you can lift the whole group at once.
Good candidates include coffee supplies, dishwashing basics or a small cooking-oil set. Avoid using trays simply to make clutter look coordinated. If the tray fills with unrelated objects, reset it rather than buying a larger one.
6. Move Paper Clutter Out of the Kitchen
Mail, school papers, receipts and packages often land on kitchen counters because the kitchen is a central circulation point. None of those categories benefits from being near food prep.
Create a small paper landing area outside the active prep surface: a wall file, slim basket on an entry console or dedicated inbox. If your entrance is tiny, our small entryway drop-zone guide can help keep paper and keys from migrating into the kitchen.
The fastest way to make a small kitchen feel larger is often removing non-kitchen clutter rather than reorganizing kitchen tools.
7. Use Vertical Wall Storage for Lightweight Daily Tools
A rail, magnetic strip, peg system or shallow wall shelf can move selected tools off the work surface. This is most useful when the wall is directly adjacent to the task and the installation is suitable for the wall and load.
Do not cover every vertical surface. Too many exposed tools can create visual clutter and make cleaning harder. Choose a short list of genuinely useful items.
Renters can compare over-door, magnetic, tension and removable methods in our renter-friendly wall-storage guide. Follow both the lease and organizer instructions; “removable” does not mean risk-free on every finish.
8. Add a Shallow Shelf Only When It Frees More Space Than It Consumes
A narrow shelf above a counter can hold mugs, spices or small everyday containers, but it should not project so far that it makes the counter below uncomfortable to use. Measure the depth, head clearance and what happens when cabinet doors open.
Heavy shelves require suitable wall anchors and installation. If secure mounting is not appropriate, use cabinet interiors, a cart or another freestanding solution instead of relying on an overloaded adhesive shelf.
9. Create a Sink Zone That Can Be Lifted for Cleaning
Dish soap, hand soap, a sponge and brush can quickly spread across the sink edge. Keep only current-use products in one washable tray or caddy that can be lifted so the counter underneath dries fully.
Do not store more bottles beside the sink than you can realistically use. Refills belong under the sink or in another cabinet if that area is safe and suitable.
If you are reorganizing the cabinet below, our under kitchen sink organization guide covers plumbing clearance, cleaning-product safety and renter-friendly storage.
10. Choose a Dish-Drying System That Matches How You Wash
A full-size dish rack can consume most of a small counter. If you use a dishwasher for nearly everything, a compact rack or absorbent drying mat may be enough for knives, pans and hand-wash items. If you hand-wash all dishes, a larger rack may be justified because it supports a major daily task.
Over-sink racks can free counter space, but they must fit the sink securely and cannot interfere with the faucet or safe use. Roll-up racks can be useful when they can dry fully between uses.
The right drying solution is the smallest one that handles your normal wash load without creating a pile of wet dishes elsewhere.
11. Keep Fruit Visible Without Giving It the Whole Counter
A fruit bowl can encourage easy snacking, but oversized bowls often become catch-alls. Choose a container sized to the amount of room-temperature produce your household normally keeps.
Not all produce belongs at room temperature. Follow product-specific storage guidance. The FDA notes that perishable fresh fruits and vegetables such as berries, lettuce, herbs and mushrooms should be refrigerated at 40°F or below. Its produce safety guidance is a useful reference.
When the bowl is empty, let the empty space remain empty rather than filling it with unrelated kitchen objects.
12. Store Cutting Boards Vertically Instead of Flat on the Counter
Cutting boards stacked flat can create a large visual and physical footprint. If a cabinet, drawer divider or narrow vertical slot can hold them safely, the boards become easier to grab while freeing the counter.
If you keep one board out because you use it constantly, store it upright only if the holder is stable and the board can dry completely. Do not wedge a damp board tightly against a wall.
The FDA advises washing countertops, cutting boards and utensils between handling raw meat and foods such as produce that may be eaten without further cooking. Counter organization should make cleaning easier, not create hard-to-reach crevices.
13. Use a Slim Rolling Cart as Overflow, Not a Second Cluttered Counter
A narrow cart can hold a toaster, pantry overflow, mixing bowls or frequently used appliances when cabinet space is limited. Measure the cart’s total footprint, including handles and wheels, and confirm it can park without blocking doors, drawers or circulation.
Give each shelf a purpose. If every shelf becomes a miscellaneous layer, the cart simply moves clutter from one place to another. Our no-pantry kitchen guide explains how a cart can work as a food-storage zone rather than random overflow.
14. Create a Grocery-Landing Routine
An organized counter can become chaotic in ten minutes when groceries arrive. Protect part of the prep zone as a temporary landing area. Unpack refrigerated food first, then shelf-stable food, then deal with packaging.
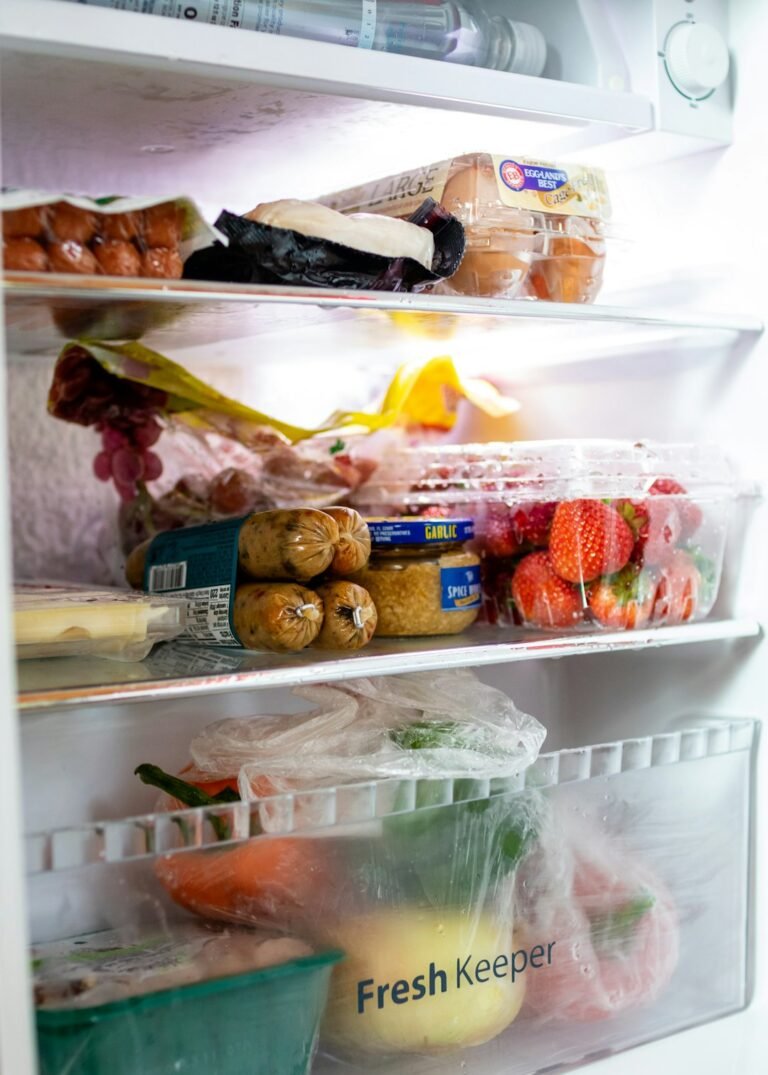
If the refrigerator is difficult to load because it is already crowded, use our small fridge organization guide to build a flexible grocery-day zone.
A landing routine matters because organization is not only about where objects live. It also controls the transition points when objects enter the home.
15. Finish With a Two-Minute Nightly Counter Reset
At the end of the day, return stray objects, put dry dishes away, wipe the active prep area and restore the core zones. The reset should be short enough that it can happen on an ordinary weekday.
If the routine regularly takes fifteen minutes, the counter probably holds too much or too many objects do not have permanent homes. Fix the storage system rather than increasing the cleanup burden.
How Much Should Stay on a Small Kitchen Counter?
There is no universal percentage that works for every kitchen. A studio with 4 feet of counter and a galley kitchen with 10 feet have different needs. Instead of chasing a visual ratio, use functional tests.
- Can you place your normal cutting board without moving appliances?
- Can you unload a typical grocery bag?
- Can you wipe the full prep surface without relocating ten small objects?
- Can appliance doors, lids and cabinets open safely?
- Can two people use the kitchen without constantly moving countertop items?
If the answer is no, remove more objects before adding organizers.
Countertop Storage by Kitchen Layout
| Layout | Main counter problem | Best first move |
|---|---|---|
| Single-wall kitchen | Every task shares one run | Protect one prep segment and use vertical storage selectively |
| Galley kitchen | Two narrow runs become appliance parking | Assign one side for prep and one for selected appliances when possible |
| L-shaped kitchen | Corner becomes dead clutter zone | Keep the corner light or use it for one deliberate low-use item |
| Studio kitchenette | Very little horizontal surface | Move non-kitchen clutter out and use one portable work surface if safe |
| Kitchen with peninsula | Peninsula becomes drop zone | Separate dining/landing edge from food-prep area |
Renter-Friendly Counter Organization
Renters should prioritize solutions that do not require permanent alterations: freestanding risers, magnetic storage on compatible surfaces, over-door organizers, carts and removable solutions that are explicitly suitable for the surface.
Before using adhesive products, read both the organizer instructions and lease requirements. Paint type, humidity, grease and surface preparation affect whether an adhesive mount will hold or remove cleanly.
Freestanding solutions still need stability. Tall narrow carts and shelving should follow manufacturer anti-tip guidance where applicable. Do not skip a required anchor simply because the home is a rental; choose a different product if safe installation is not possible.
What Not to Do on a Small Kitchen Counter
- Do not line the backsplash with dozens of containers. Vertical visual clutter can make a small room feel busier even when the counter itself is technically clear.
- Do not decant every ingredient for aesthetics. Preserve labels and food information where needed.
- Do not place storage too close to heat or flame. Follow appliance instructions.
- Do not store knives precariously. Use a stable block, in-drawer system or properly installed magnetic strip appropriate for the household.
- Do not cover outlets with organizers. Electrical access should remain practical and safe.
- Do not let the counter become household storage. Mail, medication, tools and paperwork need more appropriate homes.
How to Keep the Counter Organized After the Initial Reset
Use a weekly test instead of relying on appearance. If an item stayed untouched for the entire week, ask whether it needs permanent counter space. If you moved the same appliance back and forth five times, consider giving it a better permanent position.
Watch where clutter repeatedly appears. A pile of snacks may mean the food cabinet is inconvenient. Mail may mean the entry lacks a landing zone. Reusable bottles may need one low cabinet or basket. Treat recurring clutter as information about the system.
Do not buy another organizer until you can describe the exact problem it must solve.
Frequently Asked Questions
What should always stay on a small kitchen counter?
There is no universal list. Keep the items you use very frequently and that are difficult to store elsewhere without creating more work. Common examples are a daily coffee maker, kettle, current dishwashing supplies and one small group of cooking tools.
How can I organize a small kitchen counter with many appliances?
Rank appliances by actual frequency and weight. Keep daily appliances visible, store lighter occasional appliances in accessible cabinets, and give heavy but regular-use appliances a safe low-storage location. Avoid moving heavy appliances from high shelves.
Are countertop shelves worth it?
They can be, especially when there is unused vertical clearance above short items. Skip them if they reduce prep depth, interfere with cabinets or become another surface for random clutter.
How do I make a small counter look less cluttered without hiding everything?
Group related items, limit the number of containers, protect a visibly empty prep zone and remove non-kitchen objects. A few intentional zones look calmer than many tiny organizers.
What is the easiest first step?
Clear one prep section completely and use the kitchen normally for two days. Then return only the items you genuinely need within reach. That experiment shows which objects actually earn counter space.
Strongest Takeaway
The best small kitchen counter organization system does not maximize how much the counter can hold. It protects how well the counter can work. Start with prep space, keep only high-frequency items visible, group tools around real routines and move unrelated clutter out of the kitchen.
Next, connect the counter with the rest of the room: organize the small refrigerator, improve under-sink storage, use our no-pantry kitchen system, and review the broader tiny-kitchen storage guide.