Under Kitchen Sink Organization: 15 Ideas for Small Spaces
Under kitchen sink organization for small spaces: 15 practical ideas that work around plumbing, leaks, cleaning supplies, trash bags and renter-friendly constraints.

Under kitchen sink organization is different from organizing an ordinary cabinet because the best storage areas are interrupted by plumbing, valves, a disposal unit, hoses and the possibility of leaks. In a small kitchen, that awkward cabinet often becomes the default home for cleaning sprays, dishwasher supplies, trash bags, sponges and whatever else has nowhere to go. When everything is pushed around the pipes, the cabinet becomes difficult to inspect, difficult to clean and surprisingly inefficient.
A better system starts by treating plumbing and maintenance access as fixed infrastructure. You organize the remaining space around it. That approach works especially well in apartments and rentals because it does not assume you can rebuild the cabinet or install permanent pull-outs.
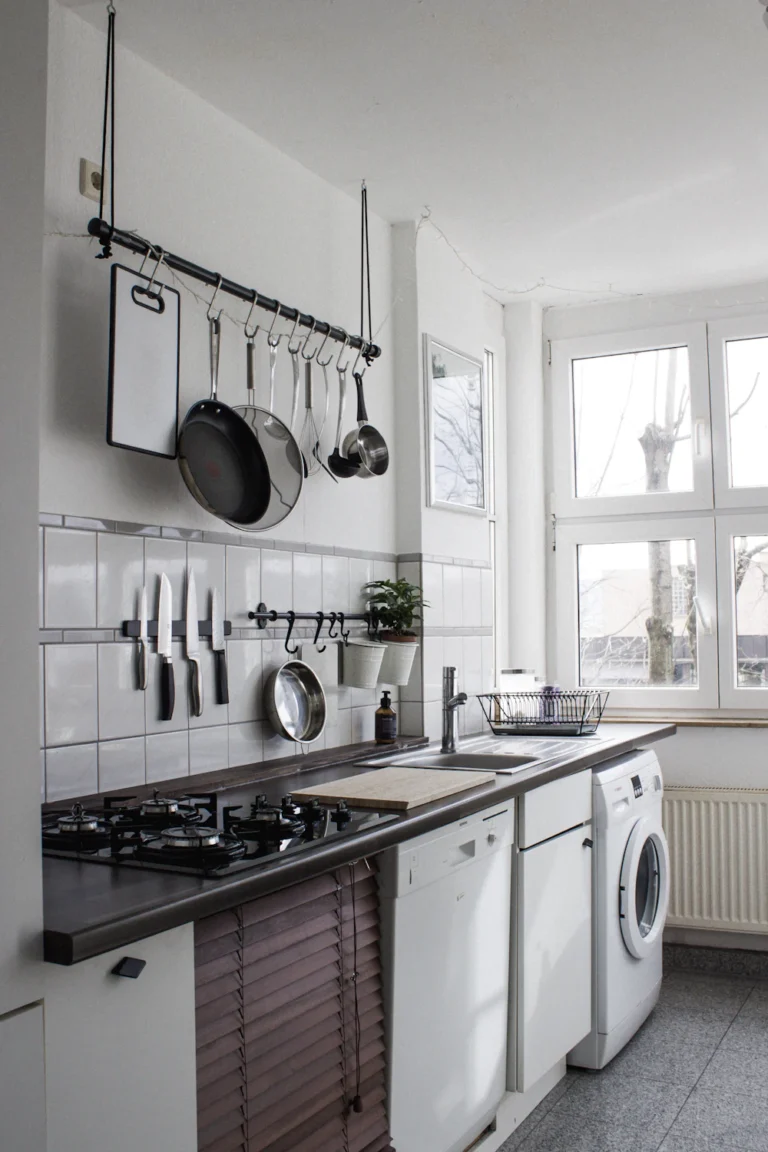
Photo: Bluewater Sweden / Unsplash.
Start With Safety, Leaks and Plumbing Access
Before buying a single organizer, remove everything and inspect the cabinet floor, back panel, plumbing connections and supply valves. Look for dampness, staining, swelling, corrosion or a musty smell. Organization should never hide evidence of a leak.
If you see an active leak or repeated moisture, address the plumbing problem before storing products in the cabinet. Do not simply place a bin under the drip and continue using the space as normal.
Also keep shutoff valves accessible. In an emergency, you should not need to unload several stacked drawers before reaching them. Photograph the empty cabinet so you can remember where pipes and valves run after storage is added.
Keep Cleaning Products Safe
Under-sink cabinets frequently hold household cleaners, so the organization system needs to respect product labels and household safety. The CDC says never to mix household bleach or disinfectants with other cleaners because dangerous vapors can be released. Its bleach safety guidance also recommends ventilation and following product instructions.
Keep products in their original labeled containers unless the manufacturer specifically directs otherwise. Do not transfer cleaners into beverage bottles or unlabeled decorative containers. If children or pets can access the cabinet, use appropriate child-safety measures and consider storing hazardous products in a safer location that meets the product instructions.
Measure the Cabinet Around the Obstacles
Under-sink space is not one rectangle. Measure it as several smaller zones.
- Door opening: measure the clear opening between hinges and the face frame. It may be narrower than the interior.
- Cabinet floor: measure usable width and depth around pipes.
- Left and right zones: note how much uninterrupted vertical space exists beside the plumbing.
- Center zone: measure how far drain pipes, disposal equipment or filters project into the cabinet.
- Door clearance: close the door slowly while holding a ruler where a door caddy might sit.
- Valve access: mark an access corridor that must stay open.
Measure at multiple heights because pipes may angle outward. A two-tier organizer that fits at floor level may collide with a drain pipe halfway up.
Divide the Space Into Four Functional Zones
| Zone | Good uses | What to protect |
|---|---|---|
| Cabinet floor | Leak tray, daily caddy, pull-out bin | Moisture visibility and pipe access |
| Side walls | Narrow organizers where secure and appropriate | Pipes, hoses and valves |
| Door | Light trash bags, cloths, gloves | Hinges and closing clearance |
| Upper open space | Adjustable shelving around plumbing | Drain pipes and service access |
Keep the categories broad. You do not need a separate container for every bottle. The cabinet should be easy to scan, not turned into a puzzle of miniature bins.
15 Under Kitchen Sink Organization Ideas
1. Put a Removable Leak Tray on the Cabinet Floor
A waterproof or water-resistant tray can contain small drips and make the cabinet floor easier to clean. Choose a tray that can be removed without disconnecting plumbing or lifting several organizers first.
Do not treat the tray as a permanent solution to an active leak. Its purpose is containment and easier cleanup, not hiding plumbing problems. Periodically remove the tray and inspect underneath it.
2. Use One Handled Caddy for Daily Cleaning Supplies
Group the few products you use most often into a handled caddy. You can lift the entire category out when cleaning and return it as one unit. This works particularly well for dish soap refills, an everyday surface cleaner used according to its label, gloves and a small brush.
Limit the caddy to products that make sense together. Do not combine chemicals simply because they fit in the same container, and never mix products. Keep labels visible.
3. Put Backstock Behind or Beside Daily Supplies
A cabinet becomes crowded when the daily bottle and three unopened replacements occupy the same prime-access zone. Keep one active product easy to reach and move sealed backstock to a less prominent area, provided the location is safe and appropriate.
Before buying another refill, check the backstock zone. That single habit can reduce duplicate cleaning products and free meaningful space in a small cabinet.
4. Choose Pull-Out Bins That Fit Around Pipes
A pull-out bin is helpful when the cabinet is deep enough that products disappear at the back. Measure the bin’s full width, including rails or handles, and test the path from the cabinet interior through the door opening.
Do not assume a two-tier pull-out organizer will fit simply because the base dimensions fit. The upper tier may collide with the P-trap, disposal unit or supply hoses.
In awkward cabinets, two narrow single-level bins can be more flexible than one large organizer.
5. Use an Adjustable Shelf Instead of a Fixed Two-Tier Rack
An adjustable shelf can create a second level beside plumbing while leaving the center open. Look for designs that allow shelf panels or supports to move around pipes.
Place lightweight items on the upper level and keep frequently used or heavier bottles lower. The shelf should remain stable without resting on plumbing.
If the organizer requires wall mounting or drilling that your rental does not permit, choose a freestanding version or another solution.
6. Store Trash Bags Vertically
Trash-bag rolls and boxes often occupy more floor space than necessary. Store them upright in a narrow bin, magazine-style holder or compatible door organizer.
Keep only the sizes you actually use. If the kitchen trash can uses one bag size and recycling does not need a liner, there is little reason for five different boxes to occupy the cabinet.
Vertical storage is especially useful in the narrow side zone that cannot fit a bottle.
7. Use the Cabinet Door for Lightweight Supplies
The inside of the cabinet door can hold lightweight, low-risk items such as clean cloths, gloves, sponges or a small roll of trash bags. Measure the interior clearance first because door storage may hit plumbing, shelves or tall bottles when closed.
Over-door baskets are renter-friendly when the bracket fits without damaging the door or preventing it from closing. Adhesive organizers require a compatible surface and careful removal according to product instructions.
Do not put heavy chemical bottles on a door organizer unless the product is designed and installed for that load.
8. Keep Dishwasher Supplies in One Defined Zone
Dishwasher tablets, rinse aid and related supplies can spread throughout the cabinet because they are used near the sink. Group them in one zone and keep original packaging or labeling where safety instructions need to remain available.
If the packaging is bulky, consider whether a smaller amount can stay in the active zone while the unopened package lives elsewhere. Do not transfer hazardous products into food containers or unlabeled jars for aesthetics.
9. Store Sponges and Brushes So They Can Dry
Wet sponges and brushes should not be buried in a closed bin immediately after use. Give them a location where they can drain and dry according to the product’s care instructions.
A ventilated holder near the sink may be better than inside the cabinet for active wet tools. Under the sink can hold clean backups or dry accessories.
The best under-sink organization sometimes means deciding that an item should not live under the sink at all.
10. Use a Tension Rod Only for Light Items and Suitable Cabinets
A tension rod is often recommended for hanging spray bottles by their triggers. It can work, but it should not become a heavy storage bar. Install it only between solid parallel surfaces, follow the rod’s load rating and position it where a fall will not damage plumbing.
Do not hang heavy full-size bottles if the rod is not explicitly rated for the combined weight. Check periodically because humidity and repeated cabinet movement can affect stability.
If a freestanding caddy provides equal access, it may be simpler and safer.
11. Add a Small Turntable Only in an Uninterrupted Corner
A compact turntable can make short bottles easier to reach in one side corner, but it needs a clean circular footprint. Plumbing-heavy cabinets often waste more space with a turntable than they gain.
Measure the diameter at the narrowest point and spin it before loading to confirm bottles will not hit pipes or the cabinet wall.
Use a turntable for a stable category such as small dish-care bottles, not for a constantly changing mix of tall products.
12. Keep Paper Products Somewhere Else
Paper towels, napkins and cardboard packaging are poor candidates for a cabinet where plumbing leaks or cleaning-product spills are possible. If possible, store paper goods in a dry cabinet, high shelf or another room.
This simple relocation can free a large amount of under-sink volume for categories that actually need proximity to water or cleaning tasks.
If dry-storage space is limited, our small-kitchen no-pantry guide offers alternatives such as wall storage, carts and cabinet zoning.
13. Create a Small Emergency-Access Corridor
Leave a direct path to water shutoff valves and plumbing connections. Mark that path mentally or physically by keeping it free of bins.
This may look like “unused” space, but it is functional access. In an emergency, that access is more valuable than fitting two more spray bottles into the cabinet.
Tell other household members where the shutoff valves are if appropriate. Organization should make important infrastructure easier to understand.
14. Add a Moisture Check to the Weekly Kitchen Reset
Once a week, look under and behind the main caddy or tray. Check for drips, damp cloths, leaking bottles or cabinet-floor swelling. The inspection takes less than a minute when organizers are removable.
A complicated built-in system can make this harder. In a rental or older kitchen, simple movable containers are often better because they let you see the cabinet itself.
CDC and EPA guidance consistently emphasize controlling moisture when preventing mold. If the cabinet repeatedly stays damp, solve the water source rather than relying on fragrance or absorbent liners.
15. Keep One Small Open Space for Change
Do not optimize the cabinet to 100% capacity. Leave room for a temporary cleaning product, plumbing work, a new dishwasher supply or a larger refill.
Flexible capacity prevents one new bottle from turning the entire cabinet into a pile. It also makes it easier to remove a caddy or reach the back without emptying everything onto the kitchen floor.
What Should Actually Live Under the Kitchen Sink?
| Good candidates | Better somewhere else | Why |
|---|---|---|
| Current dish-care supplies | Bulk paper goods | Paper is vulnerable to leaks |
| Cleaning caddy if safely stored | Food and cooking ingredients | Separate food from household chemicals |
| Trash bags | Rarely used tools | Prime space should support kitchen routines |
| Dry gloves and cloth backups | Wet sponges | Wet items need airflow and drying |
| Small bin liners | Unrelated household clutter | Keeps the cabinet easy to inspect |
Under-Sink Organization for Renters
Renters benefit from systems that are removable and do not depend on permanent cabinet modifications. Freestanding pull-out bins, caddies, adjustable shelves, over-door storage and tension products can work when they fit correctly and meet load requirements.
Before using adhesives, review the lease and the organizer instructions. Painted cabinet interiors, laminate and humid surfaces do not all respond the same way. An adhesive product that removes cleanly from tile may damage painted wood.
Do not ignore anti-tip or anchoring requirements for freestanding furniture elsewhere in the kitchen just to avoid drilling. If a product requires permanent anchoring and that is not allowed, choose a safer alternative.
For more no-drill options throughout the home, see our renter-friendly wall-storage guide.
Organizing Around a Garbage Disposal
A disposal unit can consume most of the central upper space. Do not rest bins against it or wrap storage around wiring, hoses or service points. Leave the unit visible enough for inspection and follow manufacturer guidance.
Use the left and right side zones for storage rather than trying to force a large rack under the disposal. Narrow independent bins usually adapt better than a single full-width shelf.
If the cabinet has a dishwasher hose or filtration system as well, take a photograph and measurements before ordering any organizer. Plumbing layouts vary too much for a generic “fits all sinks” assumption.
Organizing Around a Center Drain Pipe
A center drain creates two natural side zones. Use one side for the daily cleaning caddy and the other for trash bags, dishwasher supplies or backstock.
An adjustable shelf can bridge portions of the side areas while leaving the drain path open. Keep the center accessible for inspection and service.
This layout is often easier to maintain than trying to create one continuous shelf across the entire cabinet.
What Not to Store Under the Kitchen Sink
Do not store food beside household cleaners. Avoid paper goods or moisture-sensitive items when leaks are possible. Do not keep medications or personal-care items in a cabinet where household chemicals are stored.
Do not keep unnecessary duplicate products “just in case.” Multiple nearly identical cleaners increase clutter and can create confusion about which product is appropriate for a surface.
Never mix cleaning products, and never combine leftovers from two bottles. The CDC specifically warns that bleach mixed with other cleaners can release dangerous vapors. Keep labels readable and follow instructions exactly.
Common Under-Sink Organization Mistakes
- Buying an organizer before measuring the pipes: the upper tier often fails even when the base fits.
- Blocking shutoff valves: emergency access is part of good organization.
- Hiding moisture: liners and bins should make inspection easier, not conceal leaks.
- Overloading the cabinet door: heavy bottles can strain hardware or collide with interior storage.
- Using too many tiny bins: containers can consume more volume than they save.
- Storing wet cloths in closed containers: allow reusable tools to dry appropriately.
- Removing labels for aesthetics: safety information matters more than matching bottles.
- Filling every inch: flexible and maintenance space is useful space.
How Under-Sink Storage Fits the Rest of a Small Kitchen
The under-sink cabinet should not compensate for weak storage everywhere else. If pantry food is occupying the cleaning cabinet, improve dry-food storage with our no-pantry kitchen guide. If appliances and tools are crowding the room, review our tiny-kitchen storage ideas.
If the counter is crowded with dish-care refills and cleaning supplies, move appropriate backstock into the under-sink zones and keep only current-use products above. Our small kitchen counter organization guide explains how to protect prep space.
The goal is not to maximize any one cabinet. It is to give each kitchen zone a limited job so the entire room is easier to use.
A 20-Minute Under-Sink Reset
- Remove everything and place it on a towel or washable surface.
- Inspect the cabinet and plumbing for moisture.
- Discard empty packaging and deal with unwanted products according to their labels and local disposal rules.
- Separate daily supplies from backstock.
- Measure the opening and pipe layout.
- Return one leak tray or base liner if appropriate.
- Place the daily caddy first.
- Add trash bags or dishwasher supplies in a second zone.
- Keep valves visible.
- Stop before the cabinet is full.
The reset works even if you buy nothing. Better category boundaries and maintenance access often solve more than a large organizer kit.
Frequently Asked Questions
What is the best way to organize under a kitchen sink with lots of pipes?
Treat the cabinet as several small zones rather than one rectangle. Use narrow independent bins or adjustable shelving beside the plumbing and leave the central service area open.
Are pull-out drawers good under a sink?
They can be excellent for deep cabinets if their complete height and sliding path clear pipes, valves and the door opening. Measure before buying.
Can I use a tension rod under the sink?
Yes, when the cabinet surfaces and rod are suitable and the load stays within the product rating. Use it for light items, check stability and do not let it interfere with plumbing.
Should cleaning products be decanted into matching bottles?
No. Keep cleaners in original labeled containers unless the manufacturer specifically directs otherwise. Labels contain safety and usage information, and cleaners should never be mixed for aesthetic convenience.
What should I do if the cabinet smells musty?
Empty and inspect it for moisture or leaks. Address the moisture source first. Do not rely on fragrance to hide a recurring dampness problem.
How often should I reset the under-sink cabinet?
A full reset may only be needed occasionally, but a quick weekly look for drips, damp items and empty bottles helps keep the cabinet safe and functional.
Strongest Takeaway
The best under kitchen sink organization system respects the plumbing before it adds storage. Keep the cabinet easy to inspect, preserve access to valves, store cleaning products safely, use removable organizers that fit the actual pipe layout and leave some capacity unused.
Then connect the cabinet with the rest of the room: clear the small kitchen counter, organize the small refrigerator, improve food storage without a pantry and use the broader tiny-kitchen storage guide for cabinets and vertical space.